From 25.10 (Goldeye) a bridge is no longer required.
For Docker Apps (Containers)
Containers allow you to configure a MACVLAN NIC, which creates a virtual interface based on an existing physical one. The assigned unique MAC address allows the instance to appear as a separate device on the network. No bridge required. TrueNAS
For VMs — Use the Automatic Bridge (Easiest Option)
Leave Use default network settings selected while creating a new instance to allow TrueNAS to automatically assign the default network bridge. This is the simplest way to allow communication between containers and the TrueNAS host. TrueNAS
TrueNAS Goldeye handles the bridge automatically — you don’t need to manually create one.
If You Still Want a Manual Bridge — The Official Process
The docs confirm the correct order, and critically say to stop everything first:
Before making network interface changes: Stop running apps. Power off running virtual machines (VMs) and containers. Remove active NIC devices for VMs and containers. TrueNAS
Then:
Go to System > Network, edit eno2 and click the X next to Static IP Addresses to remove it, then click Save (this queues a pending change)
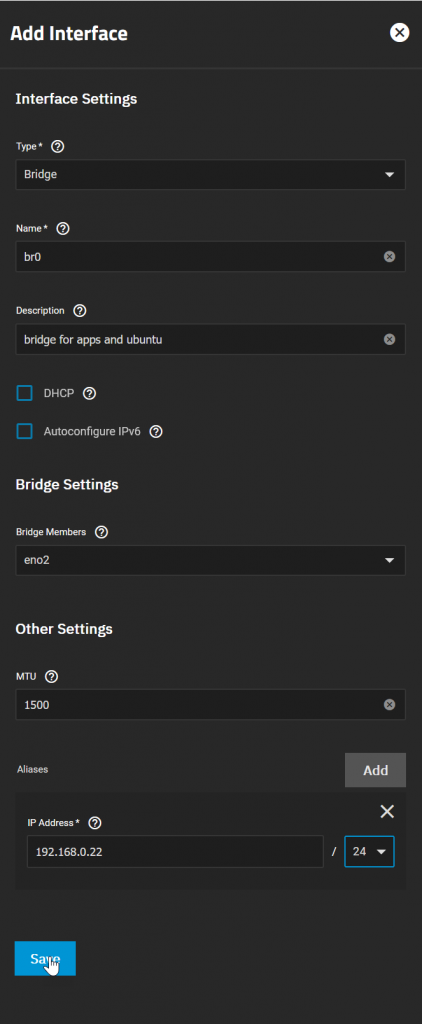
Click Add Interface, set Type to Bridge, assign the IP address and add eno2 as the bridge member
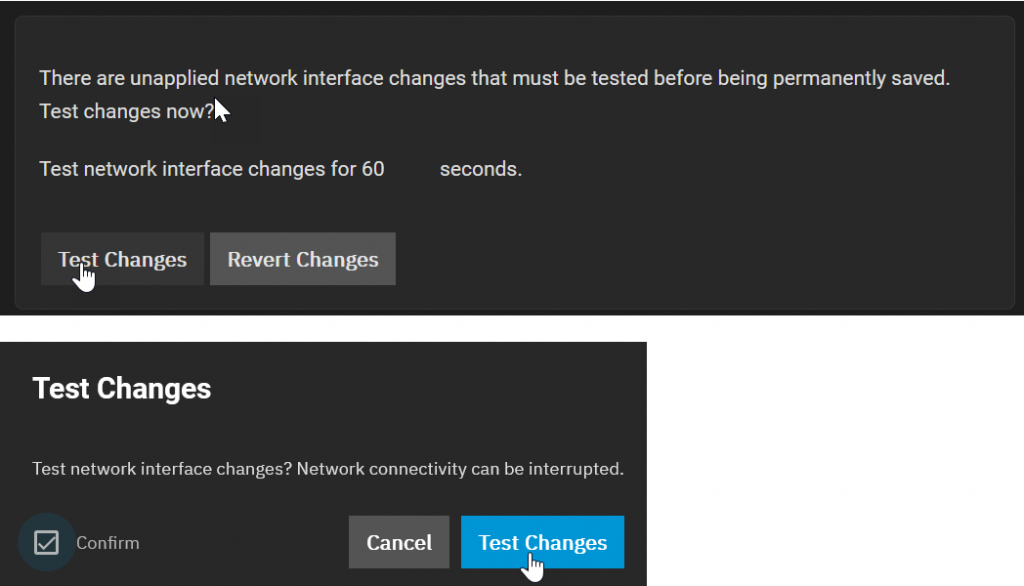
Click Test Changes and confirm within 60 seconds
🗂️ Legacy Reference — The instructions below were written for an older version of TrueNAS Scale and may no longer be accurate. Kept for historical reference only.
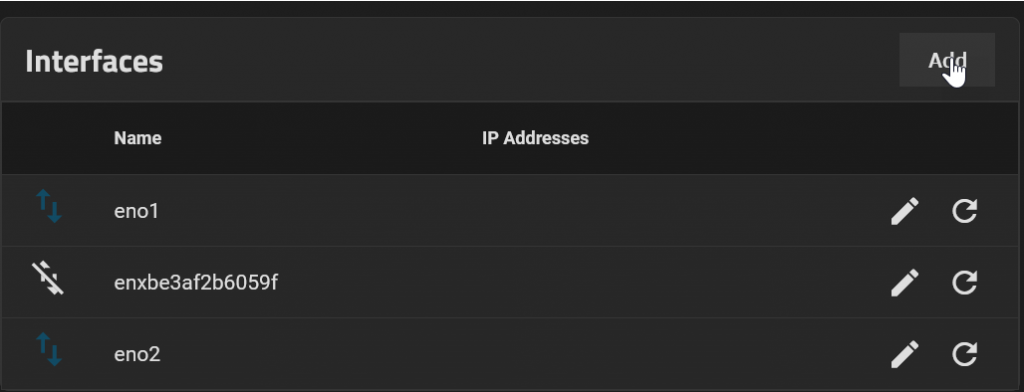
Before adding Virtual Machines to TrueNAS a network Bridge is required to allow the VMs to access the local network. In your TruNAS GUI navigate to Network>Interfaces. Identify which interface is currently connected to your network. In this example, it is “eno2”. Then click the <Add> button.
In the “Add Interface” dialogue select Type as Bridge. Give it a name for example “br0”. You can enter as description as I have. Select the bridge members in this case “eno2” You may use DHCP but I prefer to use a fixed IP address, in this case click Add against Aliases and enter the IP address you have decided upon e.g. 192.168.0.22. You also need to add the subnet in CDIR format.
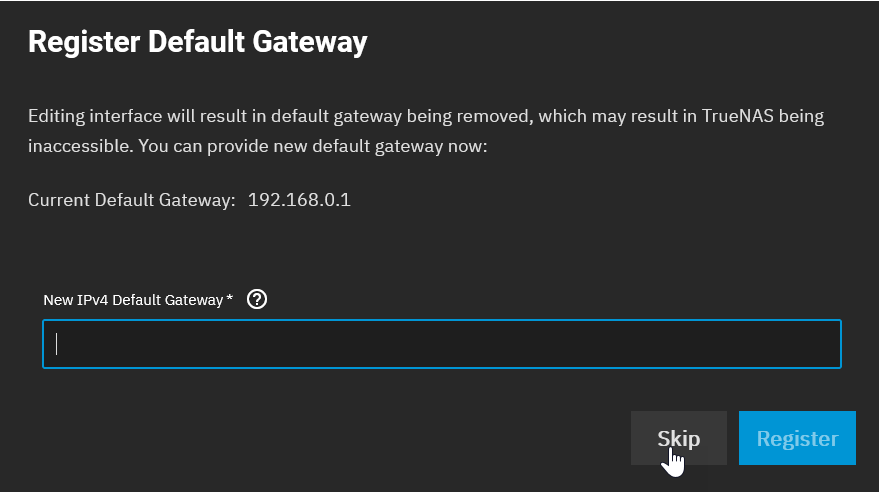
You will then be asked to enter a Gateway. or accept the default. This should be the IP address of your Router. In this case 192.168.0.1
You will then be asked to test the new connection. If you have changed the IP address, you will need to open a new browser window to see the GUI in its new location.
If all is well accept the changes and save the settings.