This post describes how to use PuTTY on a Windows PC to access a Linux device using the SSH protocol.
1. Install PuTTY
PuTTY an be downloaded from here.
Download the appropriate .msi file. (If you are not sure which version you require check out the FAQ here.)
Install in the usual way, It is safe to accept the defaults.
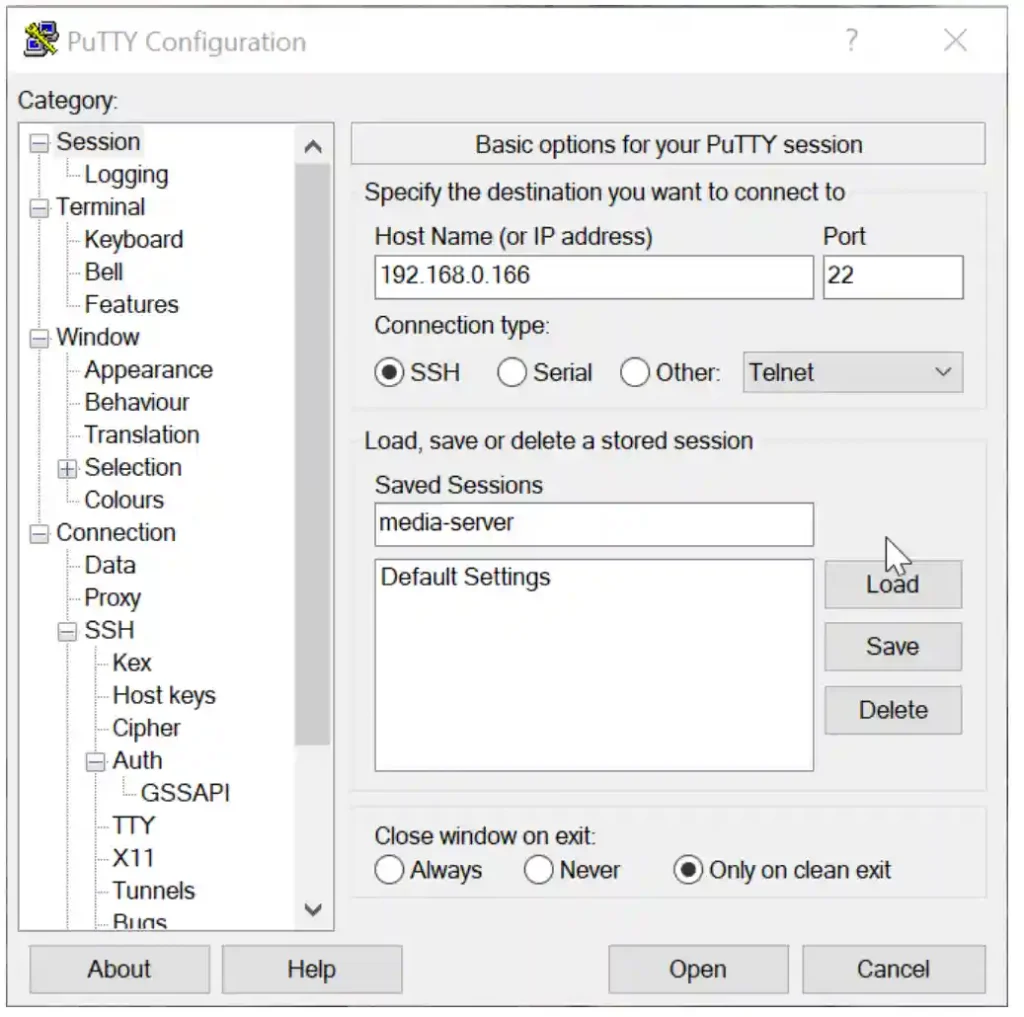
Once installed start PuTTY and you will see the following:
2. Connect to the Linux device using SSH
To test the connection type the IP address of your Linux device in the Host Name box. (equally, you might be able to use the hostname of the Linux device but the IP address is easier if you dont have your naming system established.)
Click ‹Open›
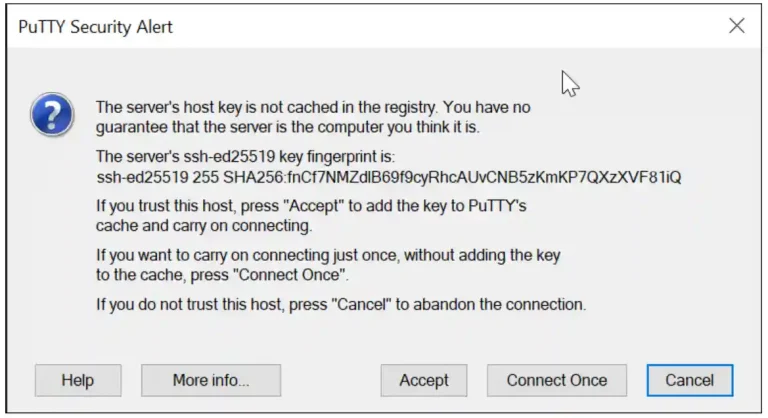
As this is the first time you have connected to this device you will recieve a secutity warning:
As you know it is safe to connect, click ‹Accept›. The key will then be stored in the registry of your computer and you will not be prompted again.
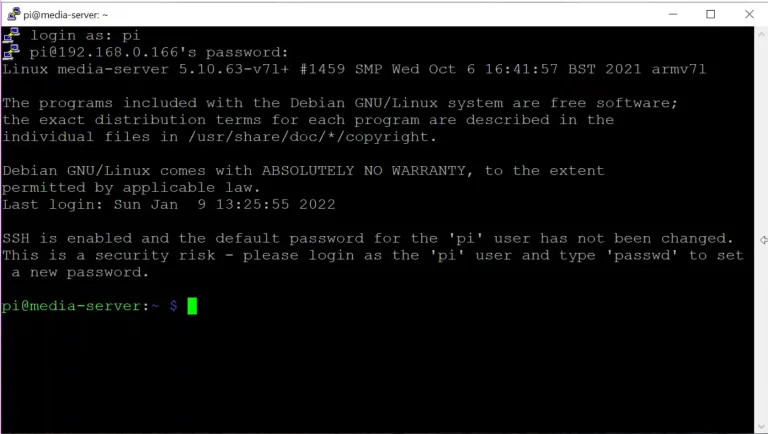
You will then be prompted for the user name and password. So login with your username and password. Note that both user name and password are case sensitive. The image below shows a Raspberry Pi login.
3. Saving a session
Ok, we know the settings work let’s save them to make it easier next time. Close the current session (click the X top right-hand corner of the window). Restart PuTTY.
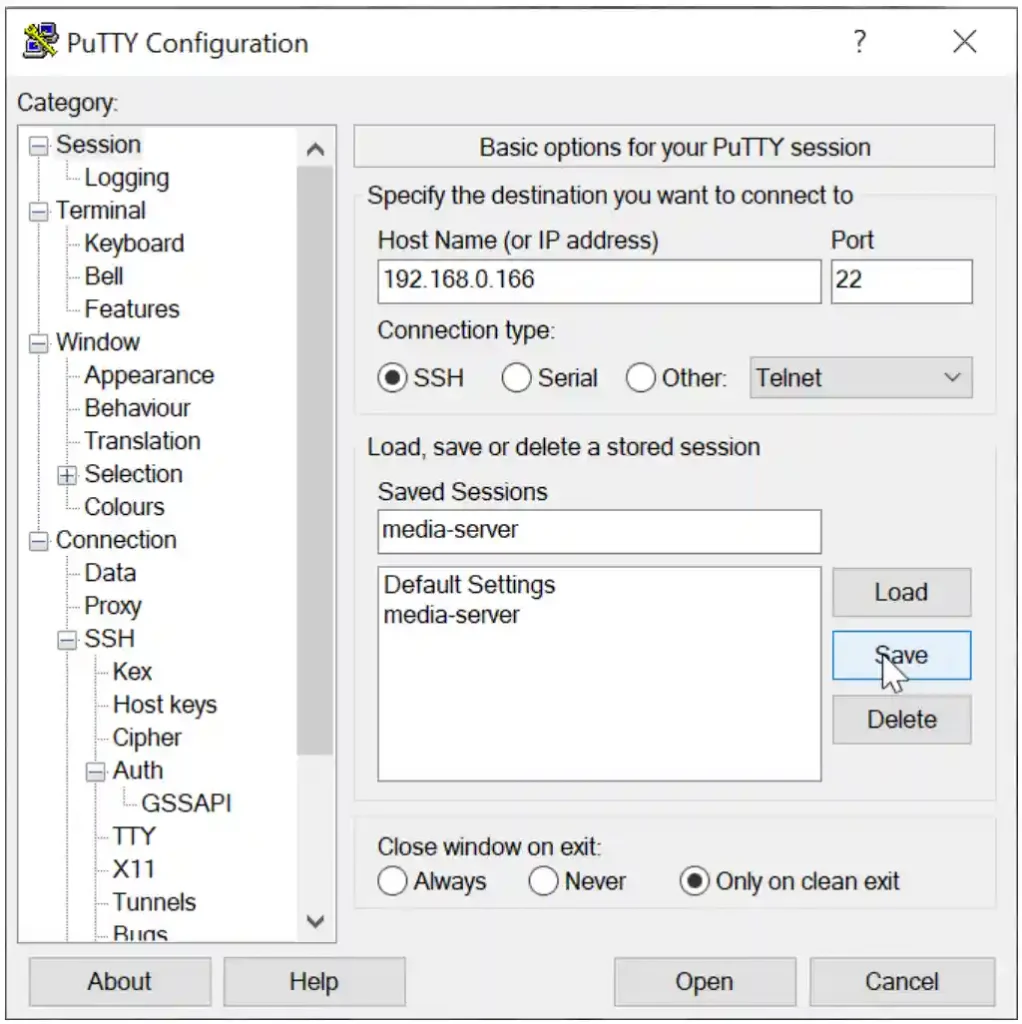
Enter the IP address again and a Session name: Then click ‹Save› and the session will appear in the Saved Sessions box:
Now you can simply double click on the Saved Session to open a SSH session with your Linux device. PuTTY does not offer the facility to save login/passwords as this would represent a security risk, you can however use a public/private key combination.


