Network Settings
Having completed the initial install and rebooted the device you will again be presented with the GRUB boot menu.
The next step is to configure the network options and give the server a fixed IP address. This can be achieved from the console but it is much easier from the GUI. In your favourite web browser enter the URL in the console mesage in my case 192.168.0.63. You may get a certificate worning at this point. Just ignore this and continue.
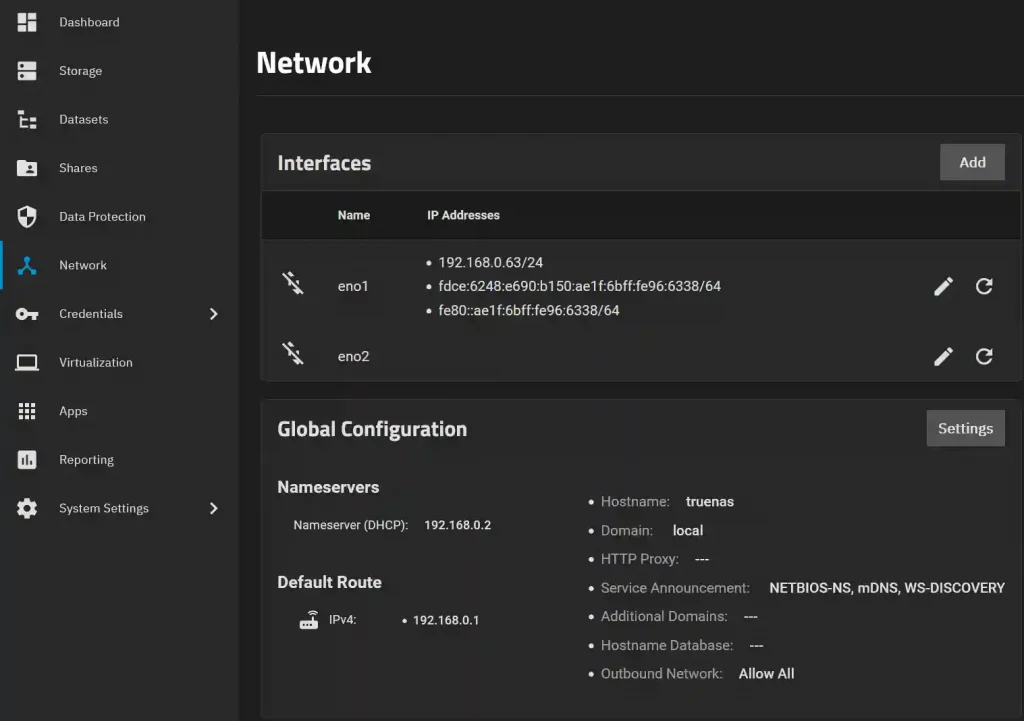
The username is admin and the password the one you entered earlier. Once logged in select Network from the main menue on the left. Here you can see that I have 2 available network interfaces one of which has the IP v4 address of 192.168.0.63 and two IP v6 Addresses. Also in the Global Configuration you can see thaty the IP v4 Nameserver is 192.168.0.2 and the default gateway is 192.168.0.1.
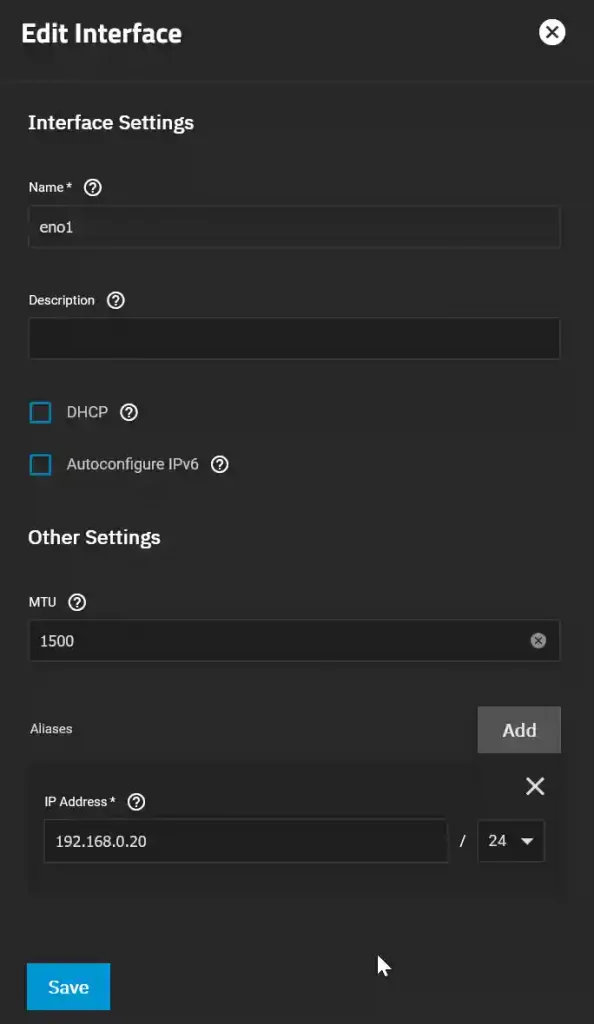
Click on the pencil next to the active network interface, in this case eno1. Deselect DHCP and then click Add. You need to identify an unused IP address on your network. In a console you could use Ping for this. It should be an address that is not included in your DHCP range. I have chosen 192.168.0.20 with the CIDR network mask of /24. This should match the CIDR in your existing network settings.
You will then be propted to Register Default Gateway. This will probably the Default Route above. Enter the gateway address and click Register. You will then be propted to Test Changes”. Once you click Test Changes the IP address of the GUI will change to the new interface so befor you do this open a new tab in your browser and point it to the new Ip address. Obviously there is nothing at this address yet so you will get the Connection timed out error. Now revert to the previous tab and click Test Changes. In the popup box click the coinfirm box and then Test Changes. Now switch to the new tab and refresh if necessary.
If all has gone well you will be prompted to login. Once you have looged in you can save the new network settings.
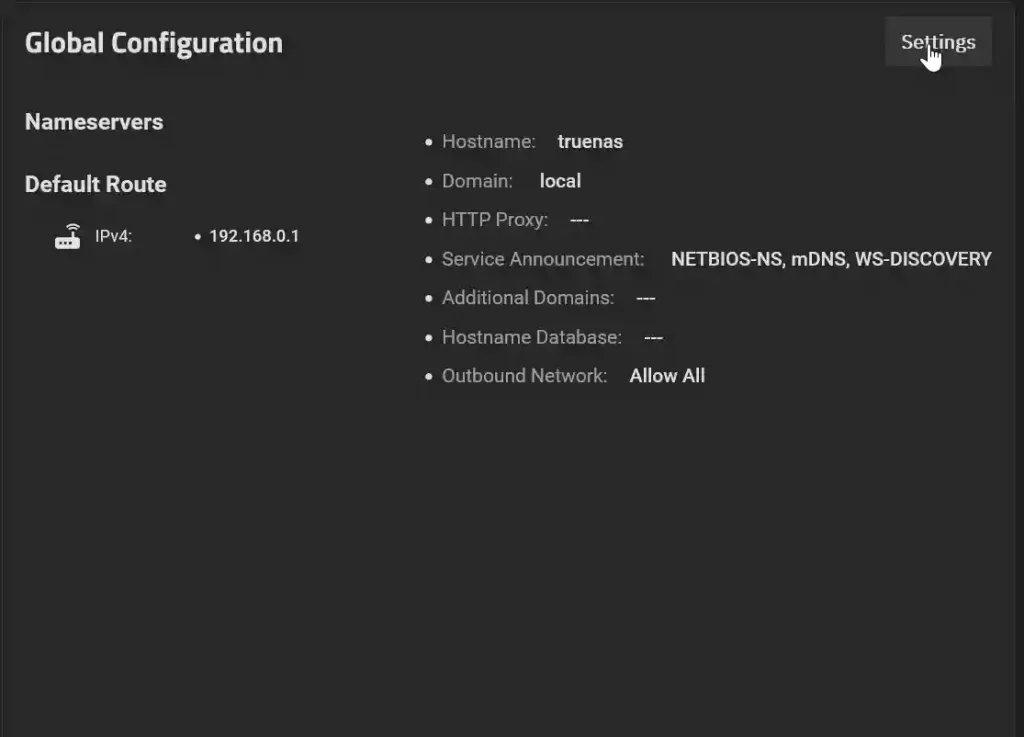
Ok, so the default route is now set but there are no name servers. Return to Network and click the Settings button in the Global Configuration pane.
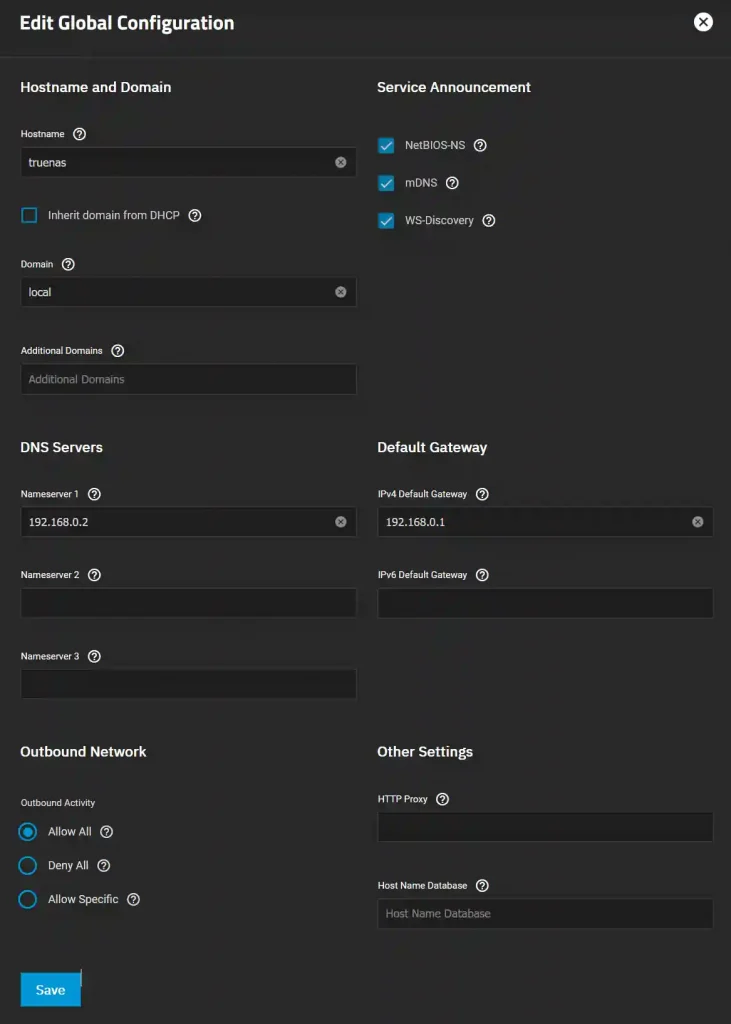
This will reveal another pane with many global options.
As you can see I have entered 192.168.0.2 which is the IP address of my Pi-Hole that I use for DNS. If you have a local DNS use that. Other alternatives are:
Google 8.8.8.8 and 8.8.4.4
Cloudflare 1.1.1.1 and 1.0.0.1
Cloudflare also offers DNS facilities with filters for:
Malware 1.1.1.2 and 1.0.0.2
Also malware and adult content 1.1.1.3 and 1.0.0.3
Note that having more than 1 DNS is not primarily for redundancy but load balancing. So using 1.1.1.1 and 1.1.1.3 would sometimes query 1.1.1.1 and sometimes 1.1.1.3 ther is no control over which DNS is used.
Have a look at some of the other options in this pane and then click Save.
Other General Settings. Localization, Email and SMTP
Go to System Settings > General and check that the localisation settings are correct. If not click Settings and make the corrections.
The easiest way to set up TrueNAS Scale to send email is to use Gmail. It is probably worth setting up a Gmail account just for TrueNAS Scale and other systems that need to send email. Go to System Settings > General and click the Email > Settings button. At this point you can enter the SMTP settings for your server or, my prefered option, click the option for Gmail OAuth.
This will open a challenge window click Proceed and then allow TrueNAS Scale to process email through Gmail. You may have to scroll down to clicl Allow. If you click Send Test Mail at this point you will get the warning.
No e-mail address is set for root user or any other local administrator. Please, configure such an email address first.
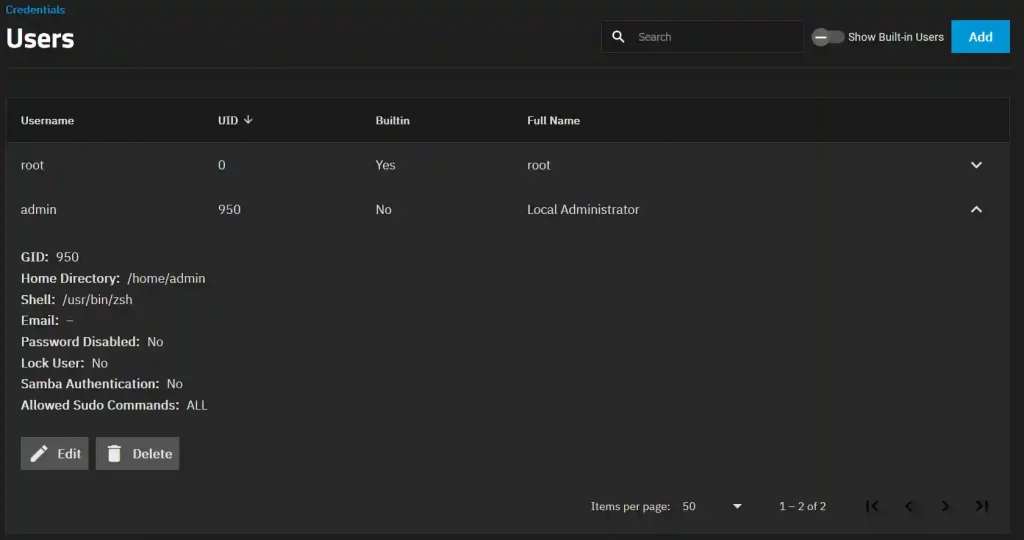
So we need to configure an email address for a local administrator. To send email the user must have the ability to login. We dont want to allow login for root so we will use the admin user which has password login. (We will change this to public/private key later.)
At the main menu select Credentials > Local Users then select the dropdown button for the admin user.
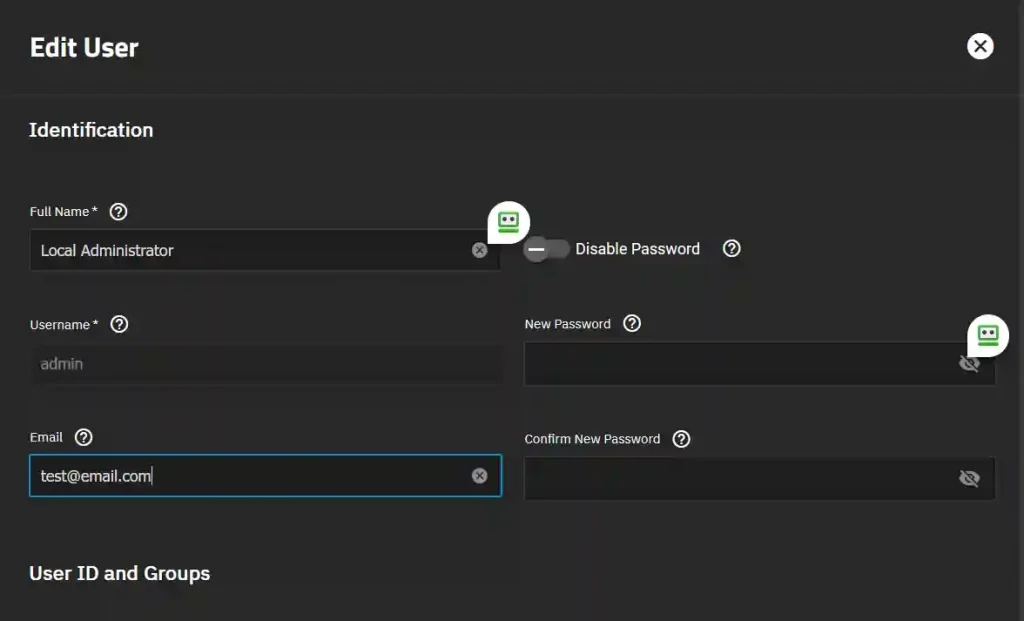
Now Click the Edit button and enter the Email address you wish any messages sent by TrueNAS to come from. Make sure to Save your changes!
Now go back to System Settings > General and click the Email > Settings button. Click Send Test Mail and you should recieve a test email. If not check your settings match above


