Install a Cloudflare Tunnel on TrueNAS Scale

1. Prerequisites

While installing Traefik is not essential, it is recommended. Traffic routing can be managed in Cloudflare, but it is easier with Traefik. This guide assumes you have Traefik installed.

2. Summary

To configure the TrueNAS App cloudflared the following information is required to be entered in the configuration.

  • Cloudflare Tunnel Token.
  • Configure Cloudflare with access control for the domain.

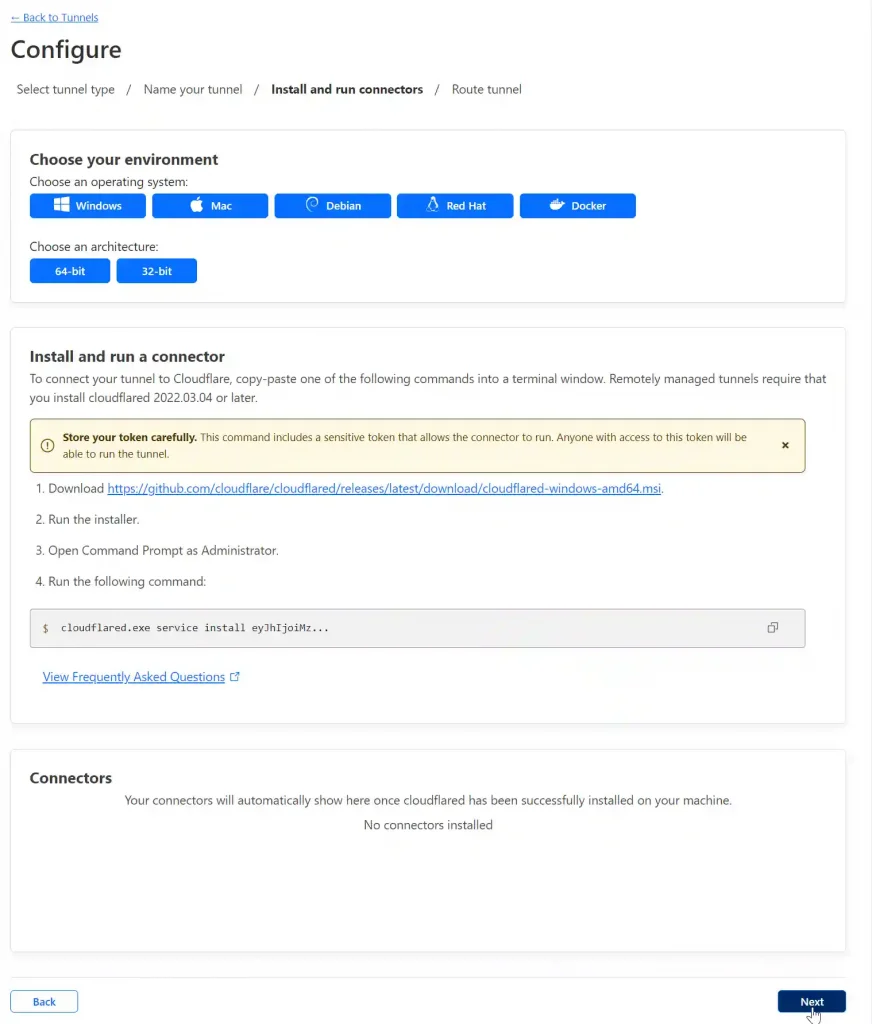
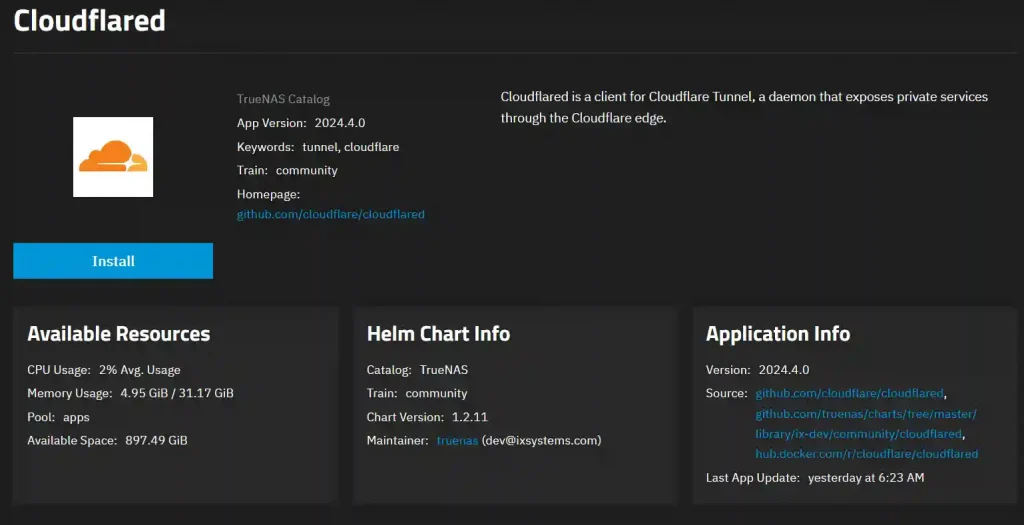
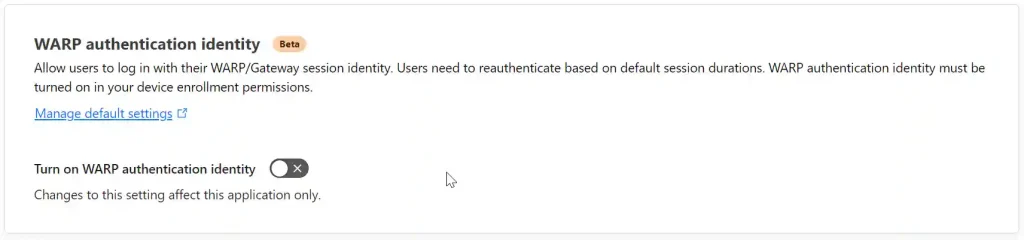
This post details the process of configuring the TrueNAS Cloudflared app with the necessary token. It guides users through configuring a Cloudflare tunnel and installing and configuring the Cloudflared app on TrueNAS Scale. It also covers how to restrict access by configuring Cloudflare Zero Trust authentication settings and setting policies for login.

3. Introduction

Setting up a Cloudflare Tunnel allows access to your services from the Internet. Cloudflare handles TLS security, enabling access through HTTPS. Cloudflare will also manage authentication if you set this up.

4. Setting up the Cloudflare Tunnel

Log in to your Cloudflare account. (If you haven’t already, set up two-factor authentication on your Cloudflare account!)

Review the Cloudflare DNS records before continuing and remove any that are not required. Click on the appropriate domain, then select DNS. Retain the A record and remove any CNAMEs that are not required.

To ensure end-to-end security, it is necessary to enable Full (strict) encryption in Cloudflare. Navigate to your Cloudflare dashboard, select the SSL/TLS option, and ensure that Full (strict) is the active setting. If not, select Full (strict) and confirm the change to activate it.

Return to Home, click on Zero Trust on the left-hand side, then from the Networks submenu, click on Tunnels. Click Add a tunnel.

Ensure that Cloudflared is selected and click Next. Name your tunnel and click Save tunnel.

To implement a Cloudflare Tunnel in TrueNAS Scale Apps all we need is the Tunnel  Token. Copy the code to the clipboard and paste it into a text editor.

You should end up with something like this:

cloudflared.exe service install eyJhIjoiMzVjZTRkOTk3ODhhNDRmYjZkZjU5NTIyODBiZmIzNDkiLCJ0IjoiOTAzZDRlY2UtODRkZi00ZjY3LWI2YjAtNDBmNTQzYjRlODZhIiwicyI6Ik56UTFOVGhoTkdVdE5EQmlaUzAwT1RNeExXRmlaVFl0TXpZMVlXUTVNVFk1TnpjeSJ9

The Tunnel Token is the long string of letters and numbers after the “cloudflared.exe service install” Copy, paste and save the token, it will be needed later.

Click Next.The next form enables you to add a Subdomain to point to the service you are offering on this subdomain. As a test app TrueCommand is running so in Subdomain enter true. In Domain select the domain from the drop-down box. The path can be left blank.

Set the service type to HTTPS and the URL to “traefik-tcp.ix-traefik.svc.cluster.local”

Click “Additional application settings” then “TLS” and in the Original Server Name field enter the FQDN of the service. In this case true.ryeroxley.co.uk.

Scoll to the bottom and click “Save tunnel“.

If you now examine the DNS table for your domain, you will have an extra record pointing to the Cloudflare Tunnel.

Return to the summary of your tunnels. As we have only set up one side of the tunnel configured the tunnel is inactive.

On your TrueNAS Scale device, go to Apps and click Discover Apps. Search for Cloudflared. This will return two Cloudflare apps, one by TrueNAS and one by TrueCharts. Click on the Truecharts version. Now click Install.

In the installation options, the only required option is the Tunnel Token, paste the token you saved earlier. All others can be left at default. For clarity, I have appended ryeroxley-co-uk to the Application name. Once completed, scroll down and click Install.

The App will start deploying, and then the status will turn to running.

Return to the Cloudflare Tunnels page and click refresh. You should now see that the tunnel is healthy.

To connect to your service, such as TrueCommand, enter the URL true.ryeroxley.co.uk (or your equivalent URL) in your browser. This should take you directly to your service. For a comprehensive test, consider using a VPN or a mobile device with WiFi turned off, as the service is already available on the local network.

Currently, TrueCommand is accessible to anyone on the internet, which may not be secure. To add access restrictions, navigate to the ‘Settings’ section in the Cloudflare Zero Trust dashboard and select ‘Authentication’. Here, you’ll find various login methods. We’ll proceed with the One-time PIN option. During login, users will be prompted to enter their email address. If the system recognizes the email, it will send a PIN to that address. Users must enter this PIN on the login form to access the service.

To set this up, go to ‘Access‘ in the left-hand menu, click ‘Applications‘, then select ‘Add an application‘ followed by ‘Self-hosted‘.

Decide whether the configuration will be applied to all subdomains or only particular ones. Enter an Application name—this can be anything. In the Subdomain field, enter either the wildcard * or the subdomain name. If you enter the wildcard, then the details will apply to all subdomains. Any subdomains not listed will be open to the internet; this is useful if you are hosting apps like WordPress.

Scrolling down Application Apperancce, Tags and Block Pages can all be left at their defaults.

As only one identity provider has been enabled, only one is available here. They can be enabled or disabled on an individual basis. Ignore WARP as it is an enterprise product. Click Next.

In the next section, set policies affecting the login. Give the policy a name, for example, “nas-access,” but it can be anything. The action is Allow. Leave Session duration set to “Same as application session timeout.”

Next, configure the rules. It makes sense to allow only emails from a specific domain. By using the ‘+ Add include‘ option, it is possible to enable only particular emails, and the Require selector allows for greater security if needed.

A configuration panel for defining access rules to an application, with include rules set for specific email addresses and domains.

Additional settings can be left at their defaults. Click Next. On the final page, accept all the defaults and click Add application.

When you visit the subdomain you entered above (true.ryeroxley.co.uk), you will be challenged to enter your email address:

Note:

  • The subdomain has been replaced with a Cloudflare domain. In this case, “https://ryeroxleyuk1.cloud…..” this will change once you are logged in
  • The protocol in use is HTTPS, and the connection is secure

Enter an email address, and you will receive an email with the PIN that can be entered in the resulting challenge box. You will then be taken to your service:

If you see an error page then return to the begining of this blog and check all the steps.

If everything is functioning properly and you want to enhance speed and security, consider enabling HTTP/2. In Cloudflare, navigate back to the Tunnel, click on the ellipsis, and select ‘Configure‘.

Next select Public Hostname:

Once again click on the elipsis and select Edit:

Click “Additional application settings” then “TLS” and enable HTTP2:

Leave a Comment

Scroll to Top