Traefik is the preferred reverse proxy for use with Truecharts. It can be configured in various ways: to work with a Cloudflare tunnel, as an open reverse proxy facilitating unrestricted internet access, or solely for internal network access. Regardless of your network’s specific needs, the initial step is to set up Traefik as a closed reverse proxy for internal use. While it may not be essential to equip a closed network with TLS and SSL certificates, implementing them at this stage is prudent. This approach also prevents issues that may arise when a web browser fails to recognize a certificate for a local host.
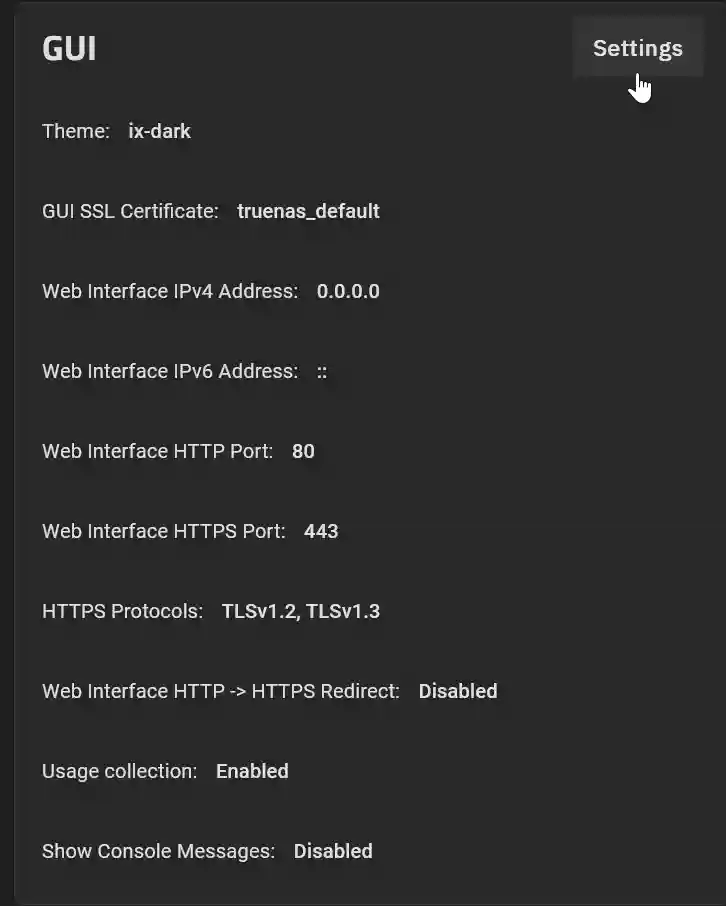
To configure Traefik as a reverse proxy, it must monitor incoming network traffic on both ports 80 and 443. Currently, the TrueNAS Scale GUI is using these ports. The first step is to reassign the ports utilized by the TrueNAS Scale GUI to free up ports 80 and 443 for Traefik. To do this, go to System Settings > General in the TrueNAS Scale GUI and then select Settings in the GUI panel.
Change the HTTP and HTTPS ports from 80 and 443 to alternative values, such as 81 and 444, respectively. Click Save. Then select Confirm and click Continue.
To return to the TrueNAS Scale GUI, you may need to refresh the webpage. To access the TrueNAS GUI from the local network in the future, be sure to include the port number in the URL. For instance, use http://192.168.0.20:81 (remember to replace this with your own IP address).
To install the Traefik App in the TrueNAS SCALE GUI, navigate to “Apps” and then “Discover Apps.” Enter “Traefik” in the search bar, click on the Truechart Traefik icon, and select “Install.”
For this simple instalation of Traefik, you can skip the optional settings. Scroll to the bottom of the panel and click “Install.”
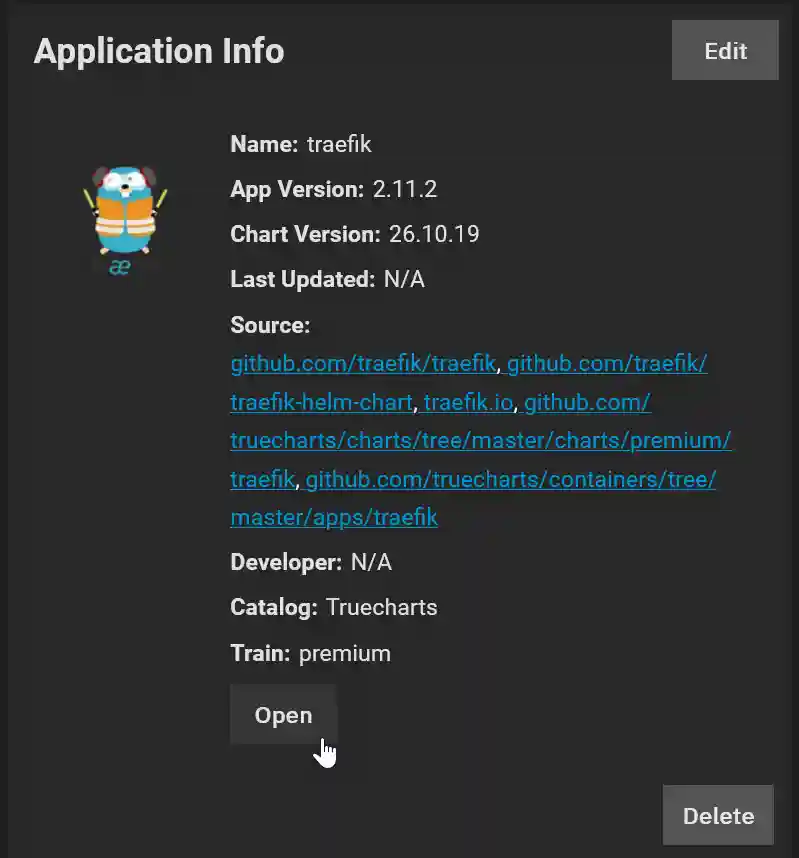
After the app has deployed and is running, you can access the Traefik dashboard by navigating to http://192.168.0.20:9000/dashboard/#/ (do not forget to change this to your IP address) or by clicking Open in the Application Info:
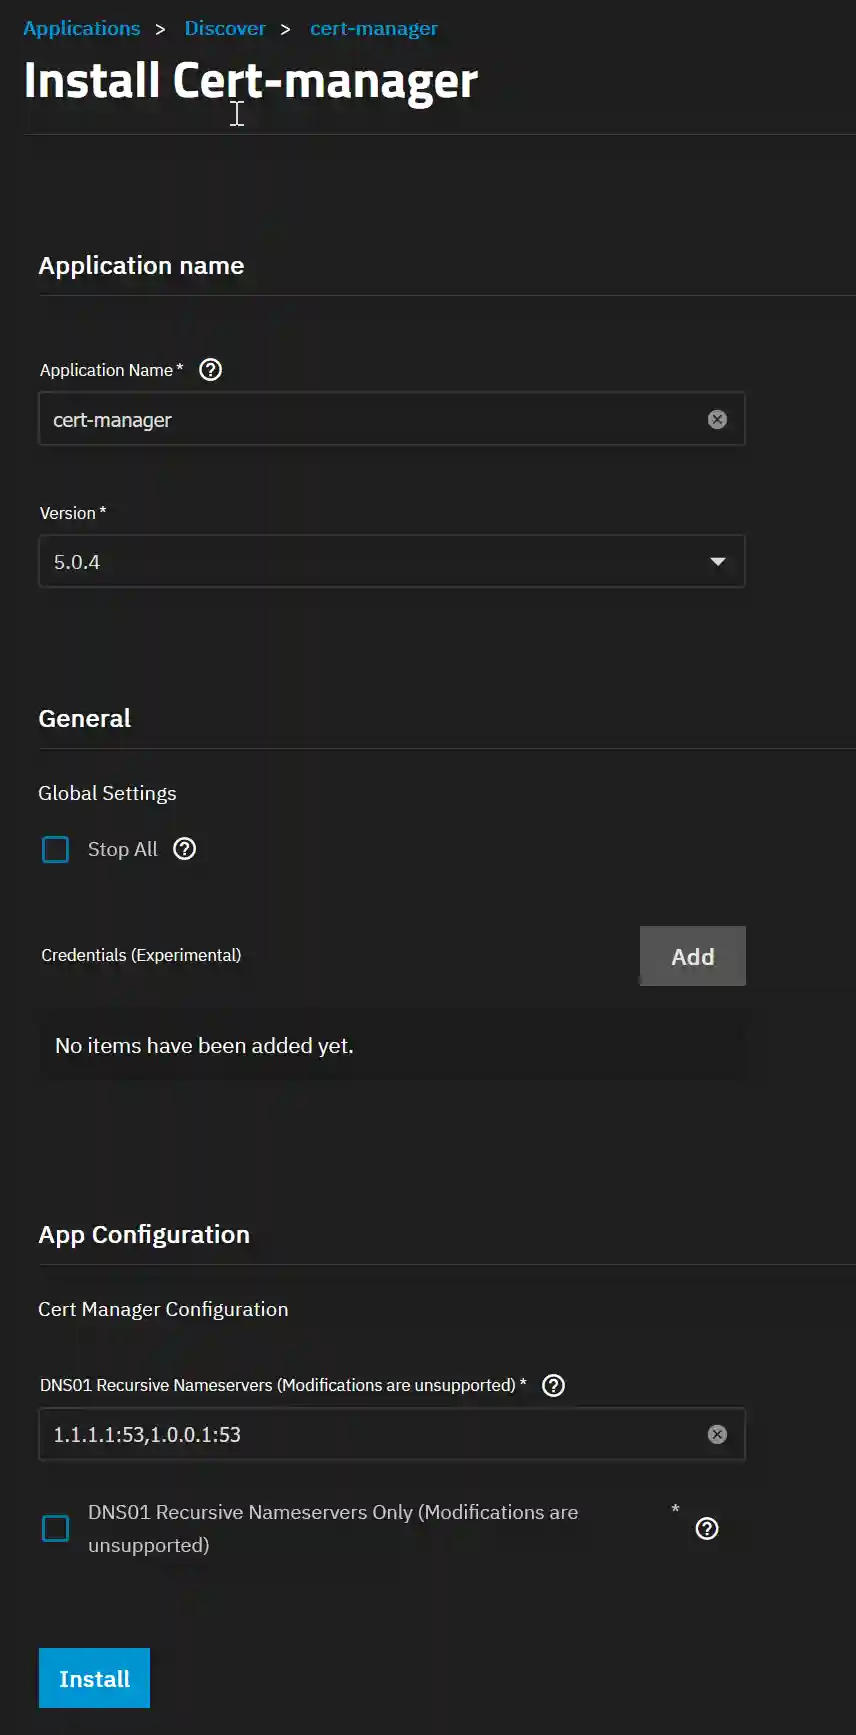
4. Install Cert-manager
The Cert-manager App is equally easy to install. In the TrueNAS SCALE GUI, navigate to “Apps” and then “Discover Apps.” Enter “Cert-manager” in the search bar, click on the Truechart Cert-manager icon, and select “Install.”
There is no need to change any of the default settings so just click “Install”.
5. Install Clusterissuer
The final app we need to install is Clusterissuer. This is the app that manages all the SSL certificates.
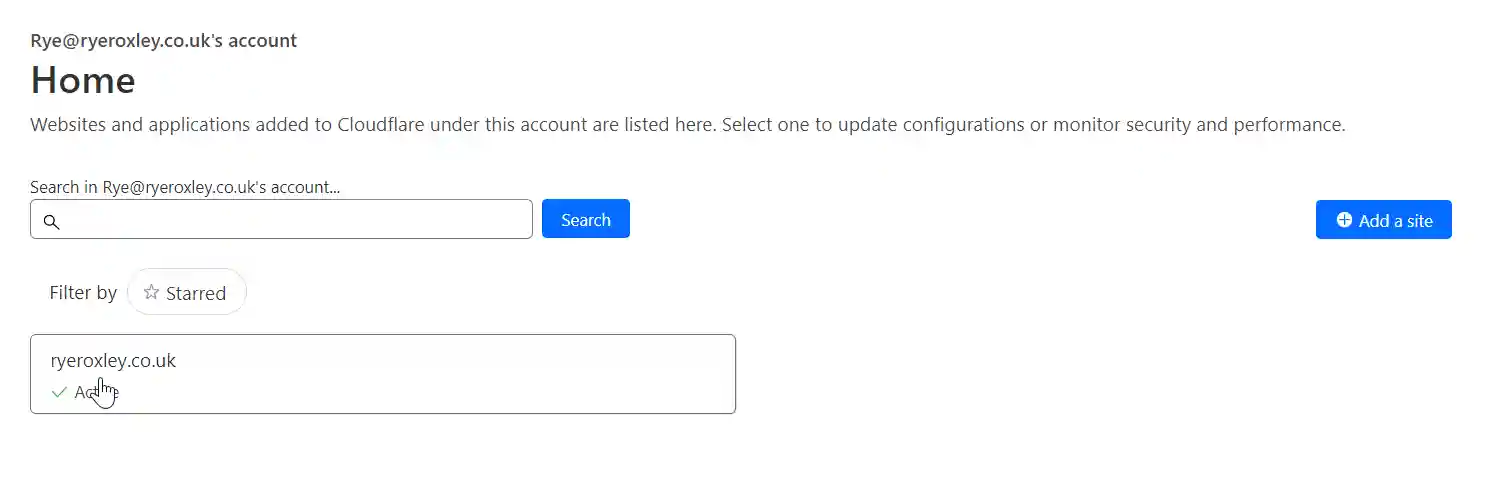
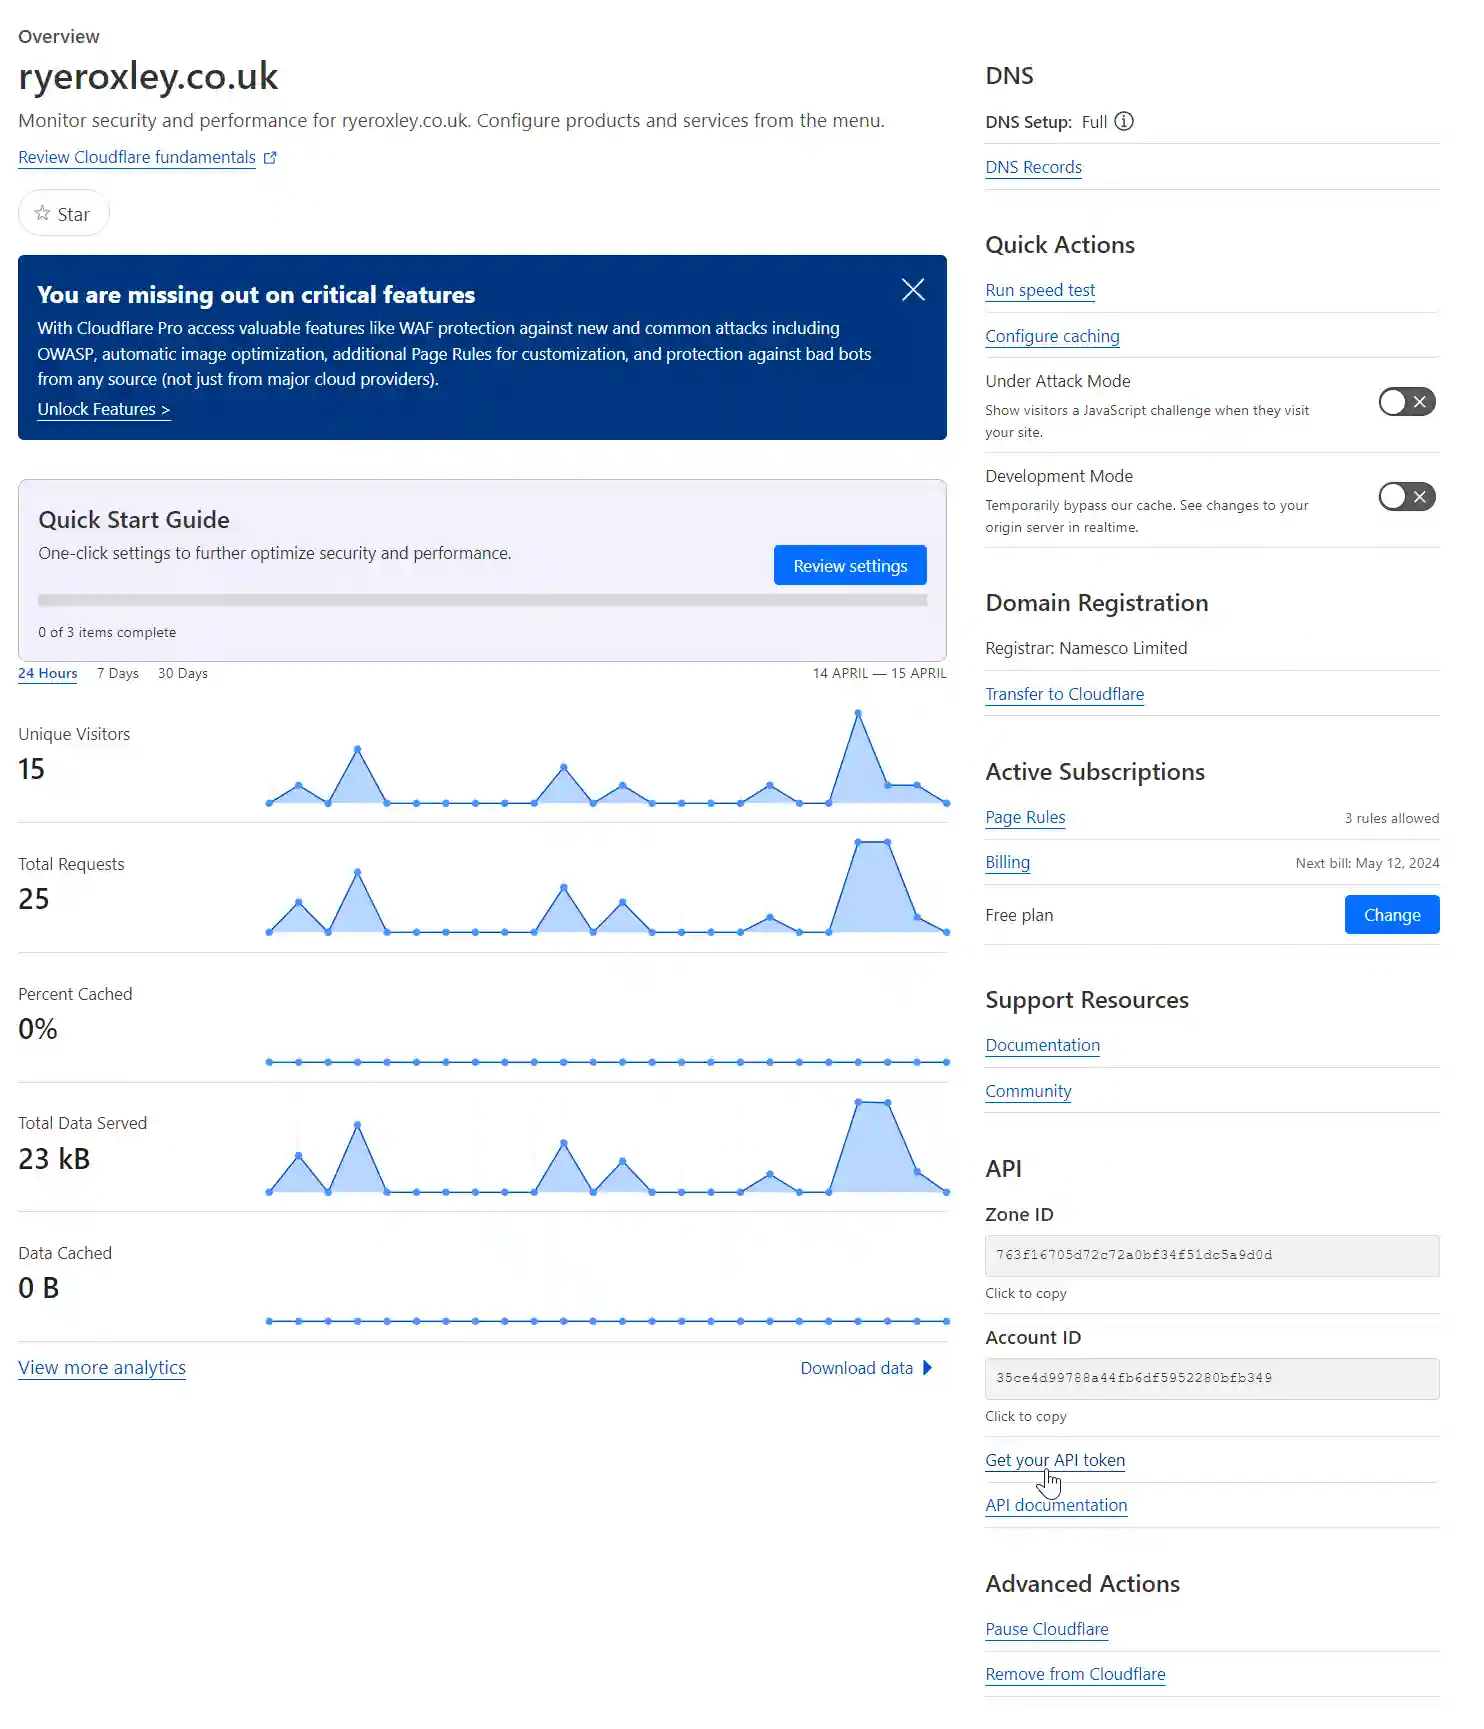
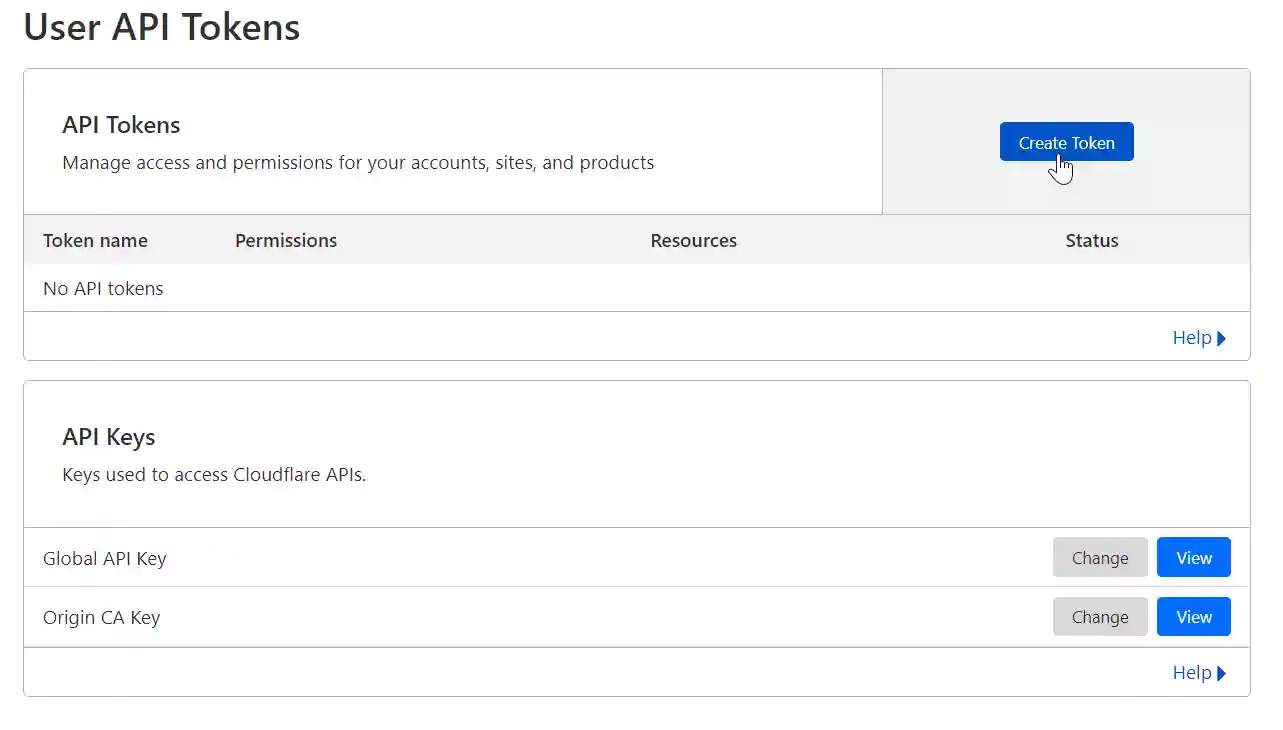
For the app to work with Cloudflare it needs a Cloudflare API token. To generate this log in to Cloudflare. Click on the appropriate domain. On the right-hand side there is a link to Get your API token click on the link. Next click Create Token.
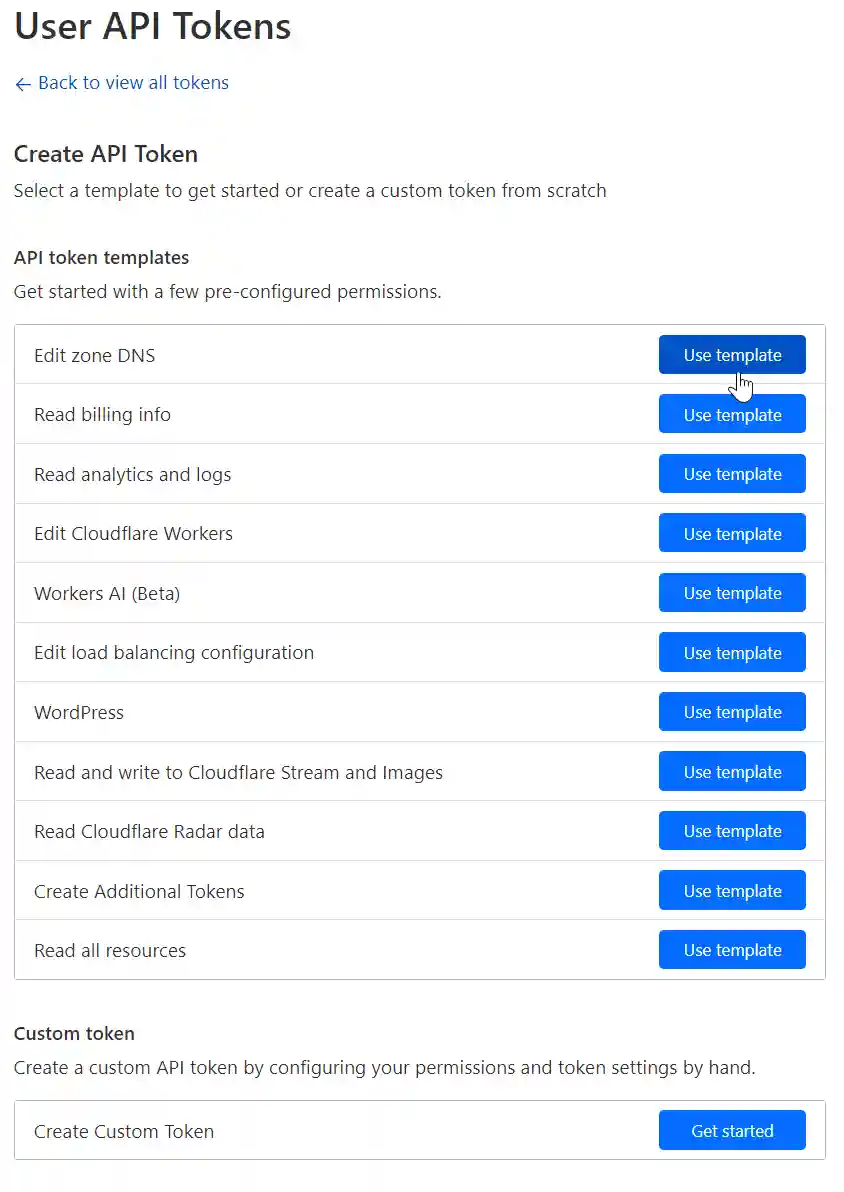
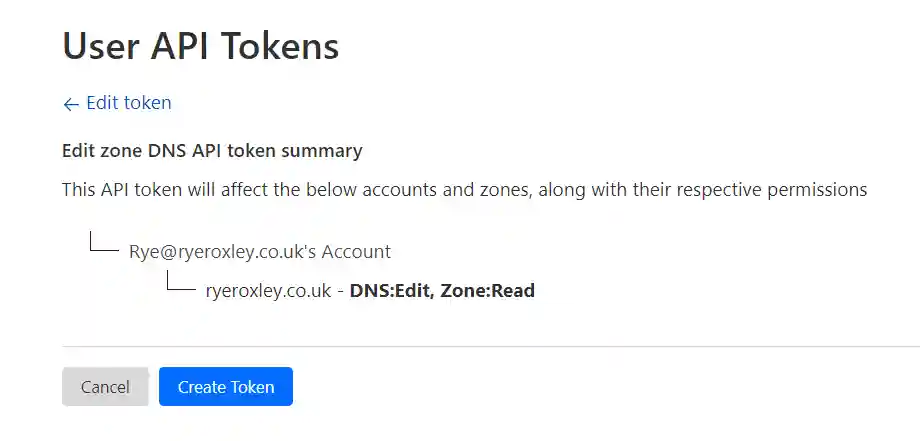
As we want to edit the A record in the DNS click on the Edit zone DNS, Use Template.
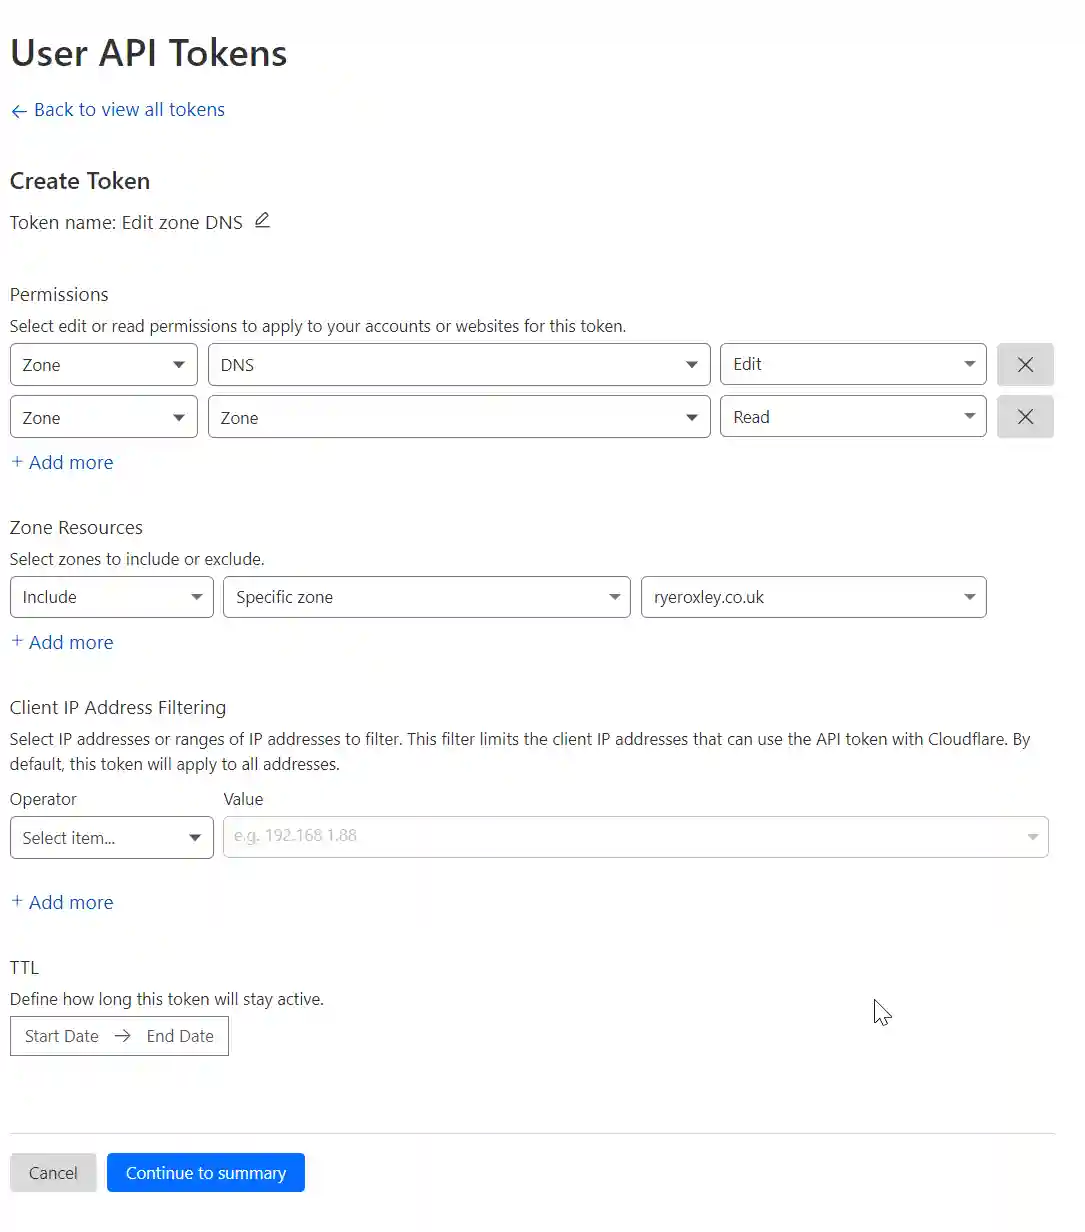
The Zone to edit is DNS and it needs Edit permissions. Also needed is Zone read permissions so click “+ Add more” and set to Zone/Zone/Read. The Resource to include is the specific domain to edit. (if you are hosting more than one domain you may wish to leave this set to All). Optionally you can also restrict to specific IP addresses or time scales. click Continue to summary.
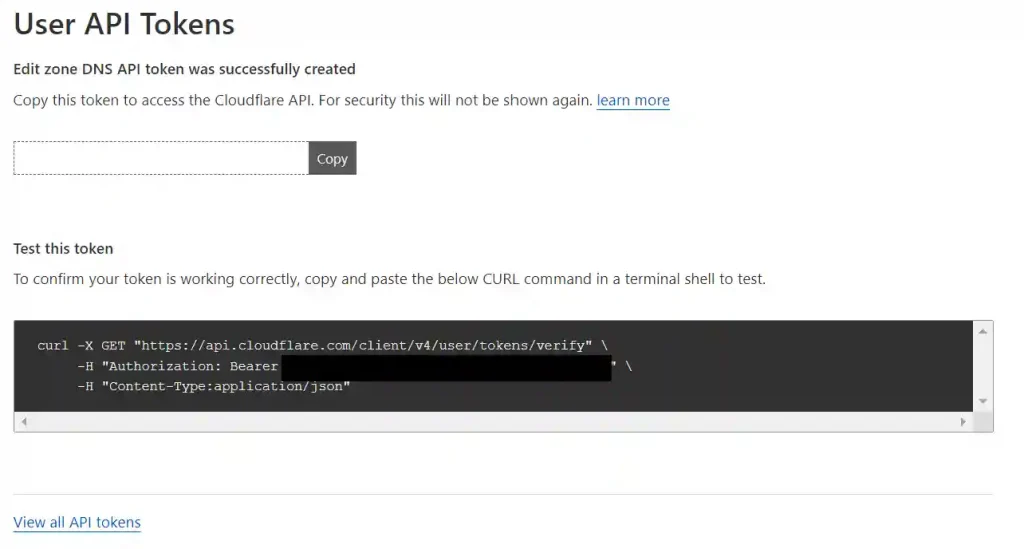
Check the summary and Create Token. The next screen displays the API Token. Copy and paste the token somewhere safe!
If you have access to a Linux shell you can test the token by pasting the code into the shell. You should get a response that includes the text “This API Token is valid and active“
To install the Clusterissuer App in the TrueNAS SCALE GUI, navigate to “Apps” and then “Discover Apps.” Enter “Clusterissuer” in the search bar, click on the Truechart Traefik icon, and select “Install.”
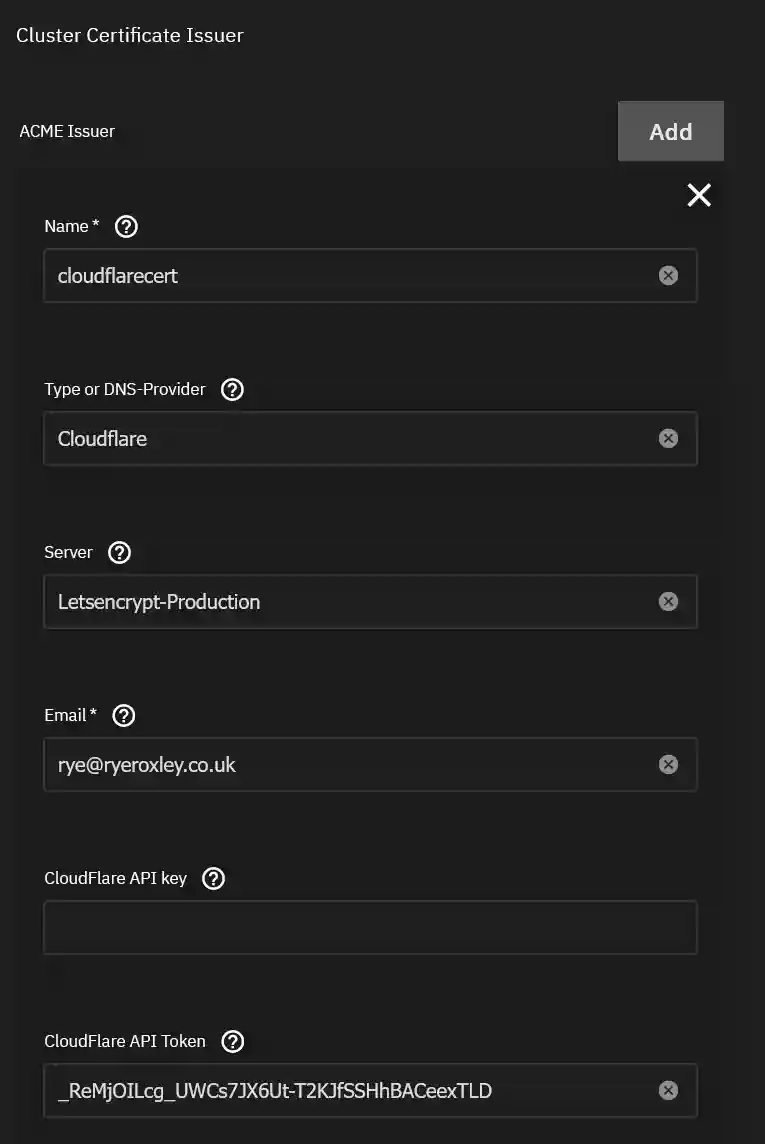
In the App Configuration section click ADD against ACME Issuer. In this block you need to:
Give the issuer a name such as “cloudflarecert”. This is the name that will be used later in the app ingress configuration
Set the DNS provider to “Cloudflare” if it isnt already set
Set the Server should be set to “Letsencrypt-Production” if it isnt already set
Email is the email Letsencrypt will use
Cloudflare API Token is the token from earlier.
Complete this section and click “Install“
6. Testing
All the required applications are now set up to use Traefik as a reverse proxy for local network traffic. To ensure it functions correctly, two components are necessary:
An application to test it with.
A DNS entry directing to the application.
First, let’s install the Truecommand app for testing purposes. In the TrueNAS SCALE interface, go to “Apps” and then “Discover Apps.” Type “Truecommand” into the search bar, click on the Truechart Cert-manager icon, and click “Install.”
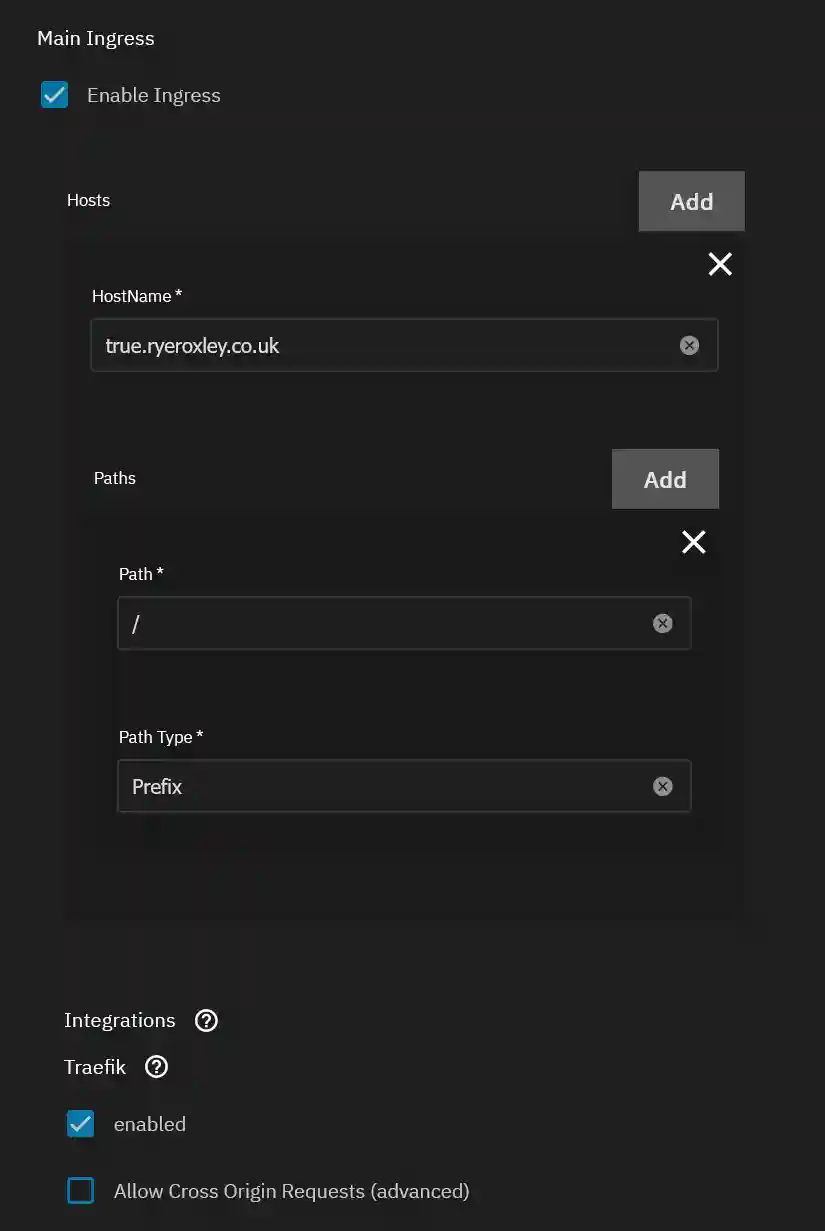
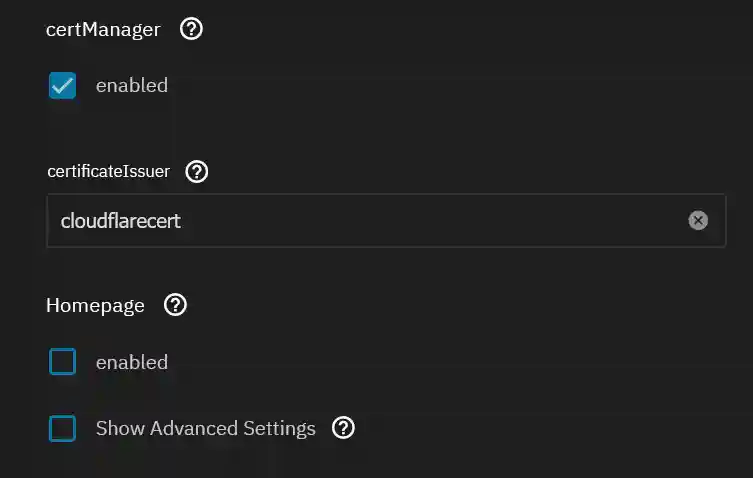
Next, in the Ingress section, enable Ingress by selecting “Enable Ingress.” Click “Add” next to Hosts. In the HostName field, enter a Fully Qualified Domain Name (FQDN) for the application, such as true.ryeroxley.co.uk. Leave the other settings at their default values.
Scroll down to “certManager” and click to enable it. In the “certificateIssuer” field, enter the name of the ACME Issuer you specified in the Clusterissuer section above. For example, use “cloudflarecert“.
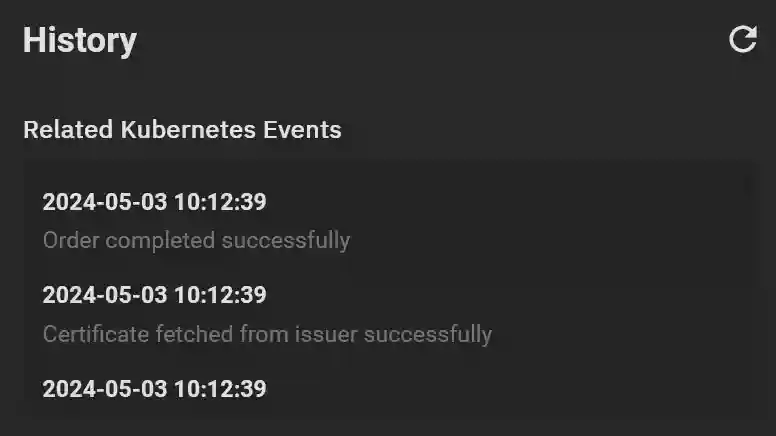
Click “Install” to proceed. After the app starts, make sure it is selected and then check the History panel. You should see a confirmation that a certificate has been successfully issued.
My preferred DNS/DHCP provider is Pi-Hole, running on a Raspberry Pi, which is not supported by Truecharts. I prefer to have a standalone server for DHCP/DNS to ensure it remains operational even when other systems are down. In this example, a DNS record is needed to direct true.ryroxley.co.uk to the IP address used by Traefik, which is 192.168.0.20. If you install and use Blocky, this process is automatic.
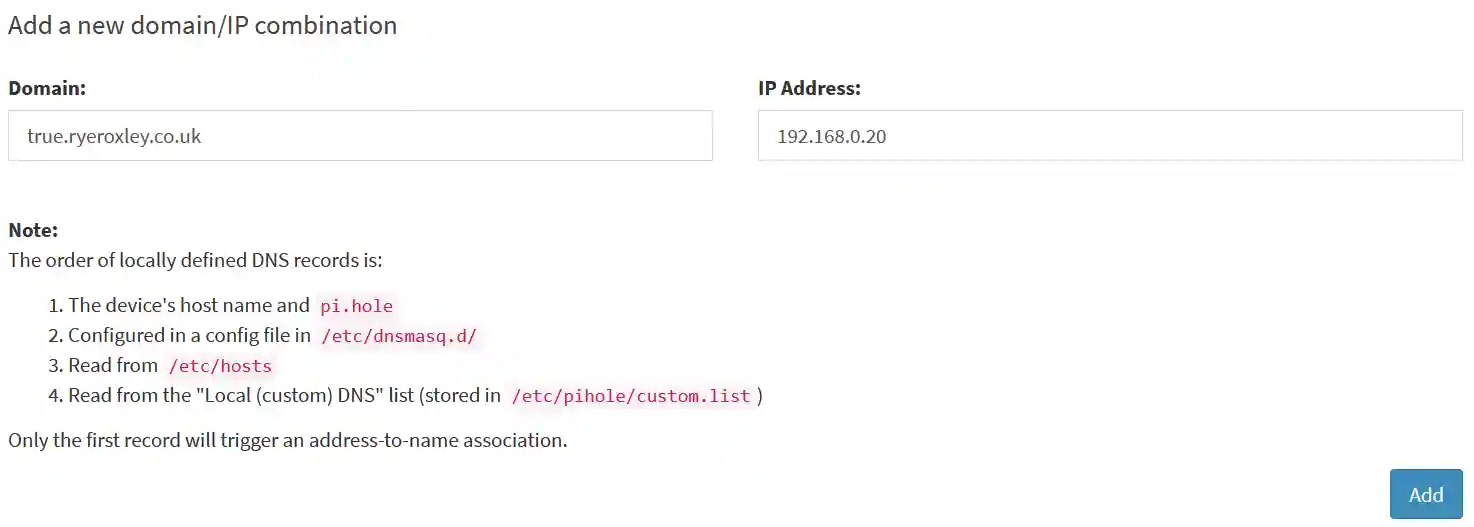
If you are using Pi-hole, log in to Pi-hole and select ‘Local DNS‘, then ‘DNS Records‘. In the ‘Domain‘ field, enter the FQDN (true.ryroxley.co.uk), and in the ‘IP Address‘ field, enter the IP address of the Traefik instance. Don’t forget to click ‘Add‘!
Once successful the domain should be listed in the “List of local DNS domains”:
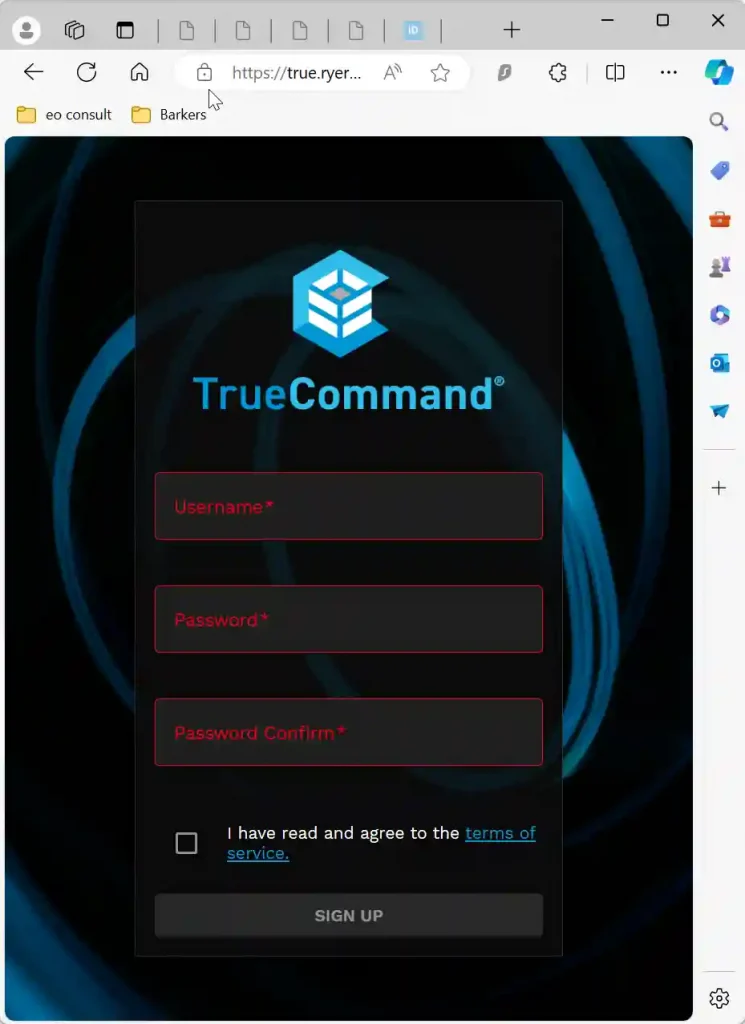
When you visit the specified subdomain (true.ryeroxley.co.uk), you should be redirected to the TrueCommand login page. Additionally, a padlock icon should appear in the URL bar, indicating that the connection is secure.
If you choose “Traefik” from the Apps list and click “Open,” you will be directed to the Traefik dashboard (http://192.168.0.20:9000/dashboard/#/). This dashboard displays the entry points to Traefik and additional details. By clicking on “HTTP” in the top menu bar, you will see a list of all routes that Traefik recognizes. Notice the green shield under “TLS” for true.ryeroxley.co.uk, indicating that SSL is active.
To enable external access, you must either set up a Cloudflare tunnel or configure Traefik to be exposed to the internet. If you encounter issues at this stage, review the steps provided in this tutorial before progressing.