Jailmaker is a Docker-related program designed to enhance security and isolation by creating confined environments, often referred to as “jails,” within a system. These jails can securely run applications or processes with restricted permissions, minimizing the risk of those applications affecting the rest of the system.
Table of Contents
Introduction
Jailmaker enhances Docker’s capabilities by providing robust isolation and security features, making it a valuable tool for environments where security is a top priority. Within TrueNAS Scale, I use Jailmaker to manage my Docker containers.
Key Features
- Isolation: Jailmaker focuses on creating isolated environments where processes can run without interfering with each other or the host system. This is similar to Docker’s containerization approach but with a stronger emphasis on security.
- Security: By confining processes within a jail, Jailmaker helps prevent potential security breaches. If an application within a jail is compromised, the damage is contained and does not affect the host system.
- Lightweight: Jailmaker aims to be lightweight, providing a minimal overhead environment for applications. This makes it efficient regarding resource usage, similar to Docker containers.
- Compatibility: Jailmaker is designed to work seamlessly with Docker, complementing Docker’s capabilities by adding an extra layer of security and isolation. It can be used to create more secure containers within a Docker environment.
- Use Cases: Jailmaker is suitable for scenarios where enhanced security is critical, such as running untrusted code, providing multi-tenant environments, or hosting applications with stringent security requirements
Setting Up Jailmaker on TrueNAS Scale
To set up the required storage:
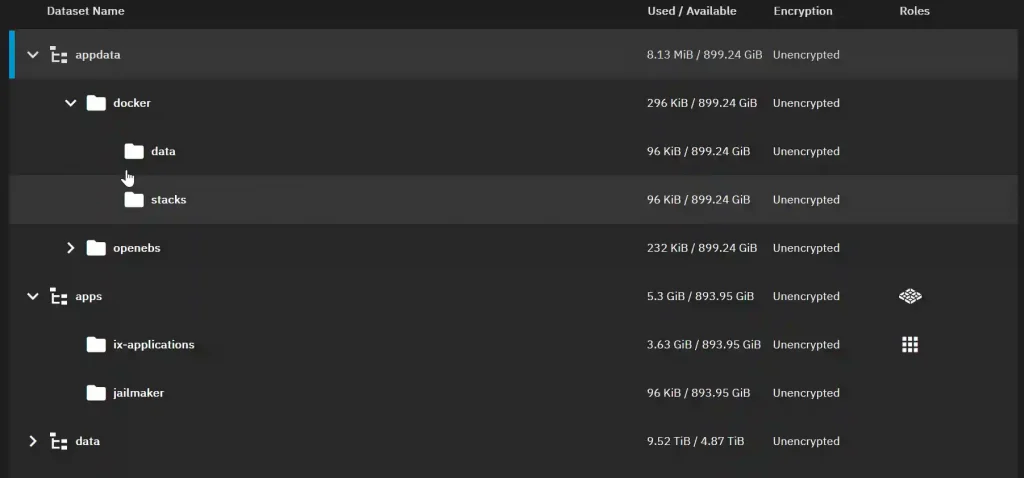
- Organize Datasets:
- Create datasets within the apps pool for the apps.
- Create datasets within the appdata pool for the app data.
- Use the built-in apps user (UID 568) and apps group (GID 568) for all apps.
Steps to Set Up Jailmaker:
- Create a Dataset:
- Create a dataset named “jailmaker” within the apps pool.
- Set Up Docker Dataset:
- In the appdata pool, set up a Docker dataset for Docker data.
- Create Additional Datasets:
- Create datasets named “data” and “stacks” for Docker.
- Set Permissions:
- Set the permissions for the Docker datasets to user “apps” and group “apps” with group write privileges. Apply these settings recursively if necessary.
Installing Jailmaker:
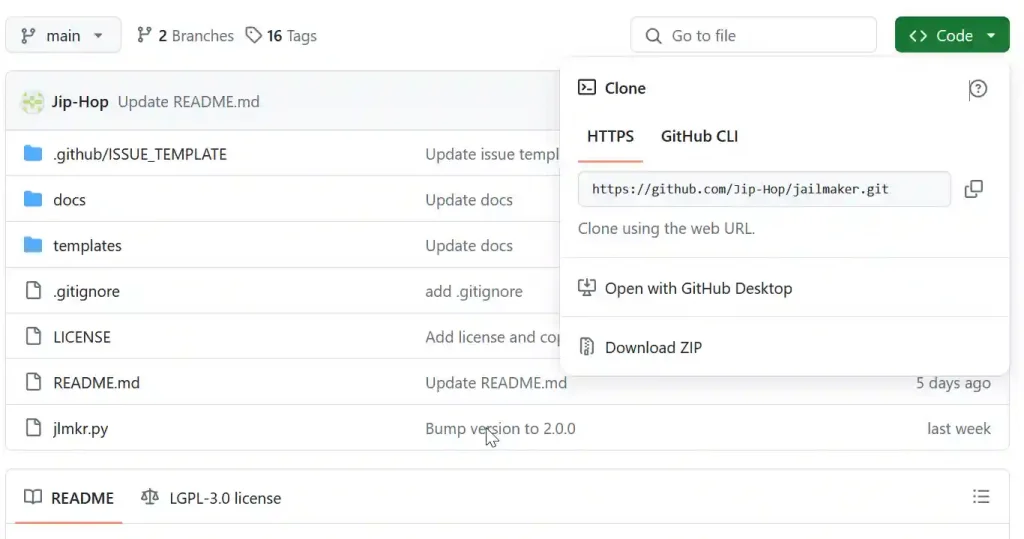
- Get the URL of the files:
- From this GitHub repository. (this should be https://github.com/Jip-Hop/jailmaker.git)
- Open a CLI shell on your TrueNAS Scale.
- Change to the apps directory:
cd /mnt/apps- Clone the Git repository:
sudo git clone https://github.com/Jip-Hop/jailmaker.gitCreating a Shell Alias
To conveniently run jlmkr.py without needing to change into the jailmaker directory or specify the full absolute path, create a shell alias for the currently logged-in admin user:
echo "alias jlmkr=\"sudo '/mnt/apps/jailmaker/jlmkr.py'\"" >> ~/.zshrcTo use the alias immediately, run:
source ~/.zshrcSetting Jailmaker to Run at Startup:
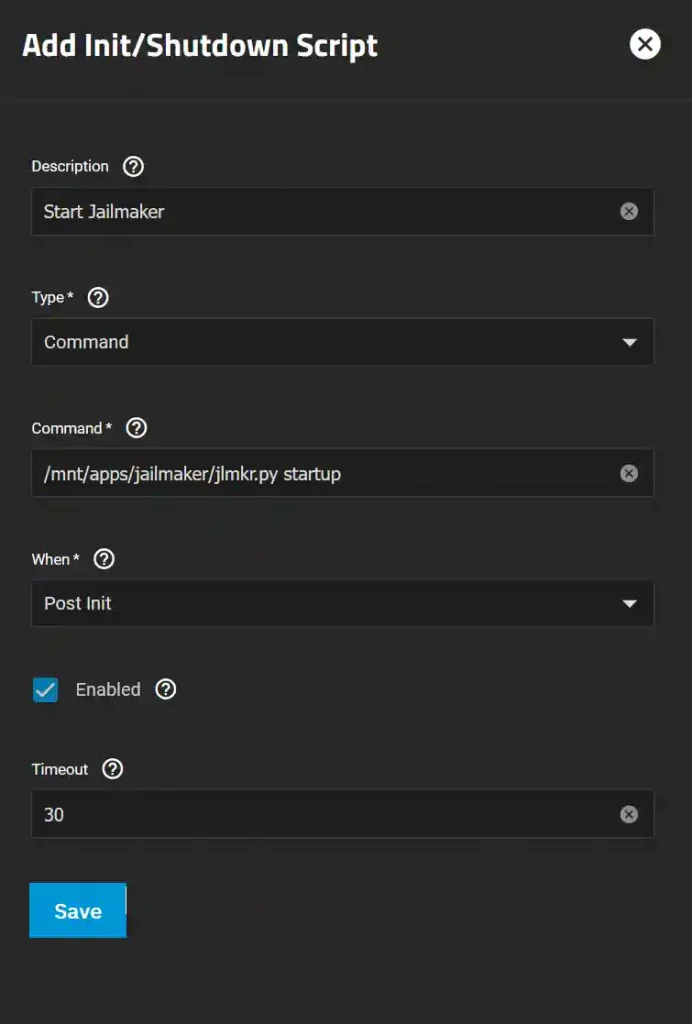
- Go to System Settings > Advanced.
- In the Init/Shutdown Scripts panel, click Add.
- Close and accept the warning.
- Increase the timeout to 30 seconds.
- Click Save.
Testing Jailmaker
To ensure Jailmaker is working, type the following at the prompt:
jlmkr listSince this command runs through the sudo alias, you will be prompted for your password. Jailmaker will return “No jails.”


